
The Ultimate Guide to DIY Heat Pump Installation in Canada (2026)
Reading time: 15 minutes
Installing your own wall-mounted heat pump in Canada is no longer just for professionals. Thanks to pre-charged DIY (Do It Yourself) systems, thousands of Canadians have already taken the plunge and saved between $1,500 and $3,000 in installation costs.
This comprehensive guide takes you from A to Z: from choosing your system to putting it into service, including all the necessary tools and mistakes to absolutely avoid.
Table of Contents
- Why choose DIY installation?
- What is the difference between DIY and standard installation?
- The necessary tools
- Preparation before installation
- The 4 steps of the installation
- The 7 mistakes to absolutely avoid
- Installation in cold weather
- Warranty and support
- Frequently Asked Questions
Why choose DIY installation?
DIY heat pump installation offers several major advantages for Canadian homeowners:
Substantial savings
Professional installation of a wall-mounted heat pump typically costs between $1,500 and $3,000 in Quebec. With a DIY system, you eliminate these costs entirely. On a Kanartic heat pump priced at $2,500, this represents a potential 50% savings on the total project cost.
No certification required
Unlike traditional systems that require handling the refrigerant (and therefore a certified technician), DIY heat pumps arrive pre-charged . The refrigerant gas is already in the compressor. You simply connect the lines—no vacuum pump or certification is required.
Total flexibility
Install whenever you want, at your own pace. No need to coordinate with a contractor, take time off work, or wait weeks for an appointment. Most DIY installations can be completed in 3 to 5 hours .
Personal satisfaction
There is a legitimate pride in having installed your own system that will heat and cool your home for the next 15 years.
What is the difference between DIY and standard installation?
The fundamental difference lies in how the refrigerant is managed:
| Characteristic | DIY Heat Pump | Standard Kanartic Heat Pump |
|---|---|---|
| Refrigerant | Pre-charged in the compressor | Pre-charged in the compressor |
| Connections | Quick connect fittings | Flared fittings |
| Special tools | No requirements | Vacuum pump, pressure gauges, flaring tool |
| Certification | Not required | Recommended certified technician |
| Installation time | 3-5 hours | 4-8 hours |
| Kanartic Guarantee | 10 years included | 10 years (professional installation required) |
In summary: DIY systems use quick-connect technology that automatically releases the refrigerant upon connection. No gas handling means no certification is required. They remain leak-proof even when disconnected.
The necessary tools
Good news: you probably already have most of the tools you need. Here's the complete list:
Essential (mandatory) tools
- Drill with a 2- or 3-inch bit (depending on the unit) — For drilling the hole in the exterior wall. This is the most important tool. A quality hole saw is recommended.
- Spirit level — The indoor unit must be perfectly level for proper condensate drainage.
- Screwdriver (Phillips and flathead) — For electrical connections and assembly.
- Adjustable wrenches or Allen wrenches — For tightening refrigeration line fittings.
- Stud finder — To locate wall studs and avoid electrical wires.
- Measuring tape — For precise measurements.
- Utility knife — For cutting insulation and sealing materials.
Recommended tools (make the job easier)
- Stepladder or ladder — The indoor unit is usually installed at a height.
- Vacuum cleaner — To clean up drilling dust.
- Caulking gun — For sealing the hole around the lines.
- Multimeter — For checking electrical connections.
- Safety glasses and gloves — Protection during drilling.
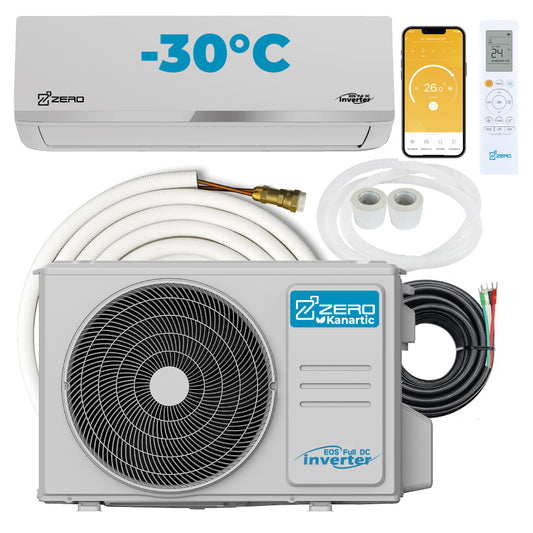
What's INCLUDED with your Kanartic DIY heat pump
- Pre-charged refrigeration lines (16 or 25 feet depending on the model)
- Communication cable
- Mounting bracket for the indoor unit
- Remote
- Installation manual in French
- Quick DIY 4-step guide
- Wall sleeve (some models)
Preparation before installation
1. Choose the right location for the indoor unit
The location of the indoor unit is crucial for optimal performance:
- Height: Install the unit at least 2.1 meters (7 feet) from the floor, or 15-20 cm from the ceiling.
- Air circulation: Avoid obstructions in front of the unit. Leave at least 15 cm of clearance on each side.
- Avoid: Direct sunlight, heat sources (stove, oven), and excessively humid places.
- Access: Provide easy access for filter maintenance and cleaning.
- Drainage: The unit must have a slight outward tilt for condensate drainage.
2. Choose the right location for the outdoor unit
- Stable surface: Concrete, slabs, or anti-vibration mount. Never place directly on the ground. We sell high-end stainless steel mounts to guarantee a longer lifespan for your investment.
- Clearance: Minimum 50 cm in front of the unit, 30 cm on the sides and above.
- Protection: Avoid areas where snow accumulates (under a dripping roof, for example).
- Noise: Move the unit away from bedroom windows and neighbors if possible.
- Distance: Ideally less than 5 meters from the indoor unit (16-foot lines) or 7.5 meters (25-foot lines).
3. Check your electrical circuit
Each heat pump has specific electrical requirements:
| Capacity (BTU) | Voltage | Recommended circuit breaker |
|---|---|---|
| 9,000 BTU | 230V | 15A |
| 12,000 BTU | 230V | 15A |
| 18,000 BTU | 230V | 20A |
| 24,000 BTU | 230V | 25A |
Important: A dedicated circuit is strongly recommended. If you are not comfortable working with electricity, hire an electrician for this part only — it's usually a 1-2 hour job that costs between $150 and $300.
The 4 steps of the installation
Installing a Kanartic DIY heat pump involves just 4 simple steps. Estimated total time: 3 to 5 hours .
Step 1: Install the wall bracket and drill the hole (45-60 minutes)
- Use the template provided to mark the location of the bracket on the wall.
- Use the stud finder to check that there are no electrical wires or pipes behind the wall.
- Secure the mounting bracket to the wall with the appropriate screws (concrete screws if concrete wall, wood screws if wooden studs).
- Check that the support is perfectly level — this is crucial.
- Drill the 3-inch (76mm) hole with a slight outward slope (approximately 5 degrees) for drainage.
- Insert the wall sleeve if supplied.
Pro tip: Drill from the inside out for better control. Have someone outside to clean up the debris.
Step 2: Run the lines and cables (30-45 minutes)
- Unroll the pre-connected refrigeration lines carefully — never bend them at an acute angle.
- Pass the refrigeration lines, communication cable and drainage pipe through the hole.
- Leave enough length inside to connect to the unit.
- Outside, run the lines neatly down to the location of the outdoor unit.
Pro tip: Use electrical tape to bundle lines and cables together. It makes routing easier and gives a clean look.
Step 3: Connect the units (45-60 minutes)
Connecting the indoor unit:
- Hang the indoor unit on the wall bracket.
- Connect the refrigerated lines to the corresponding ports (they are different sizes, impossible to make a mistake).
- Tighten the fittings by hand, then with a wrench — firmly but not excessively.
- Connect the communication cable according to the diagram in the manual.
- Install the drainage pipe — it must have a constant slope outwards.
Connecting the outdoor unit:
- Place the outdoor unit on its base (slabs, support, or anti-vibration pads).
- Connect the refrigerant lines to the ports on the outdoor unit.
- Connect the communication cable. (1-2-3, the same color as the indoor unit)
- Make the electrical connection according to the instructions. L1-L2 and GND (green)
The crucial moment: remove the valve caps located on the right side at the base of the connectors.
Using an ALLEN key, unscrew the valves (approximately 7-10 turns). Do not force at the end.
Step 4: Finalization and commissioning (30 minutes)
- Seal the hole around the lines with caulk or expanding foam.
- Secure the lines outside with appropriate fasteners to protect them.
- Check all connections one last time.
- Turn on the circuit breaker and wait 5 minutes before starting the unit.
- Start the heat pump with the remote control.
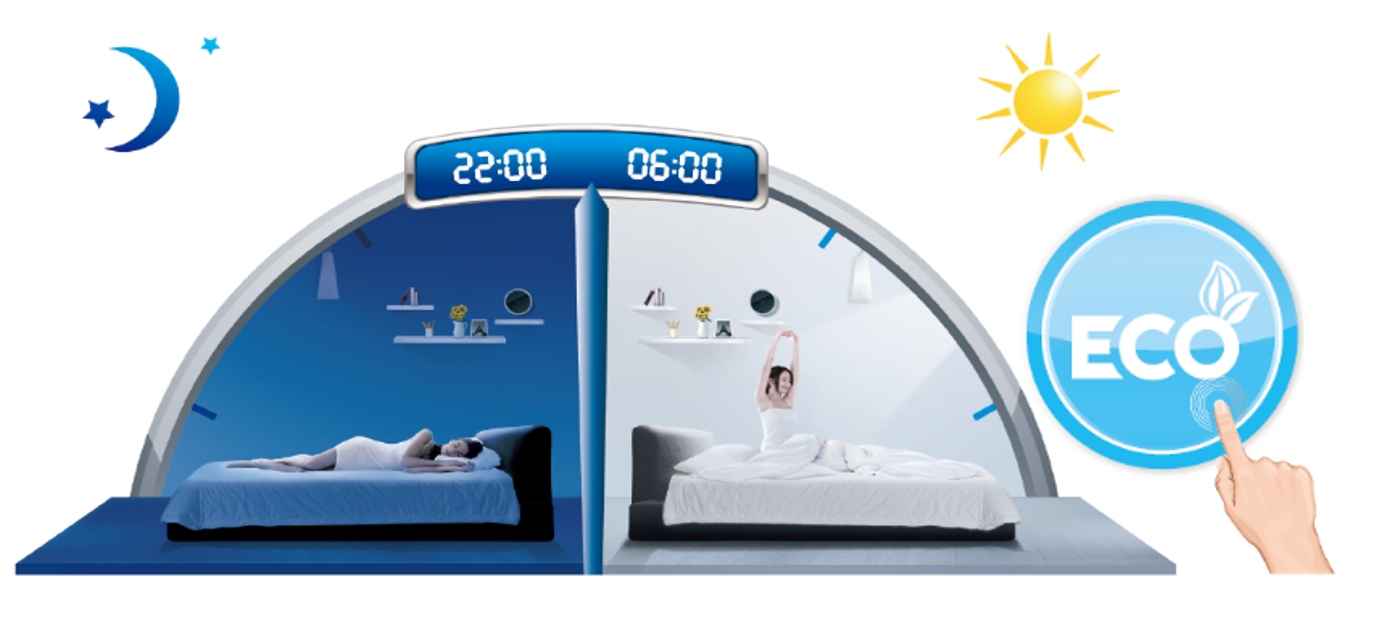
- Test the modes : air conditioning, heating, ventilation.
- Configure the WiFi if desired (NetHome Plus application).
It's finished! Your heat pump is now operational.
The 7 mistakes to absolutely avoid
Having helped hundreds of customers with their DIY installations, here are the most common mistakes — and how to avoid them:
Mistake #1: Not checking the level
The problem: An indoor unit that isn't level will cause drainage problems. Water will accumulate and could leak into your wall.
The solution: Use a spirit level when installing the bracket AND after hanging the unit. Check in both directions (horizontally and laterally).
Mistake #2: Bending the refrigeration lines too abruptly
The problem: Copper lines can get pinched if you bend them too tightly, blocking the flow of refrigerant.
The solution: Make gentle curves with a radius of at least 10 cm. Never bend at a right angle. If you need to make a sharp turn, use a bending spring.
Mistake #3: Underestimating the importance of drainage
The problem: A poorly installed drainage pipe (no slope, upward bend) will cause water backflow.
The solution: Ensure a constant slope outwards. The pipe should never rise. Test this by pouring a glass of water into the indoor unit's drip tray before closing everything up.
Mistake #4: Forgetting to seal the outside hole
The problem: An unsealed hole lets in cold air, moisture, and potentially insects or rodents.
The solution: Use expanding foam inside the hole, then silicone sealant around the lines on the outside. Double protection.
Mistake #5: Installing the outdoor unit too close to the ground
The problem: In Canada, snow can accumulate and block the unit, drastically reducing its efficiency.
The solution: Raise the unit at least 30-45 cm (12-18 inches) off the ground. Use wall brackets or stacked concrete blocks.
Mistake #6: Neglecting clearance around the outdoor unit
The problem: The outdoor unit needs air to function. If it is wedged against a wall or surrounded by vegetation, it will overheat.
The solution: Respect the minimum distances: 50 cm in front, 30 cm on the sides. Regularly prune nearby shrubs.
Mistake #7: Tightening the fittings too much (or not enough)
The problem: Too tight = risk of damaging the fitting. Not tight enough = refrigerant leak.
The solution: Tighten by hand until it resists, then give it an additional 1/4 to 1/2 turn with a wrench. No more. If you have any doubt, use a leak detector (soapy water) on the fittings.
Installation in cold weather: is it possible?
Yes, you can install a heat pump in winter, but with some precautions:
Minimum installation temperature
Avoid installation if the temperature is below -10°C . The refrigerant and seals can be affected by extreme cold.
Winter precautions
- Keep the lines warm until installation time — store them indoors.
- Work quickly once the hole is drilled to minimize heat loss.
- Seal immediately around the lines.
- Allow the outdoor unit to acclimatize for 24 hours before the first start-up.
First start-up in winter
When starting up for the first time in cold weather, run the unit in fan-only mode for 30 minutes. This allows the compressor to warm up before it calls for heat.
Kanartic Warranty and Support
10-year warranty included
All Kanartic DIY heat pumps come with a 10-year warranty on the compressor and major components. This warranty applies even to DIY installations—that's the advantage of a system designed for self-installation.
How to activate your warranty
Register your product within 30 days of purchase on our website. Keep your purchase invoice.
Technical support
Do you have a question during installation? Our team is available:
- Live chat on kanartic.ca
- Email for non-urgent questions
- Tutorial videos are available on our YouTube channel.
Frequently Asked Questions
How long does the installation take?
It takes between 3 and 5 hours for a first installation. Experienced DIYers can do it in 2-3 hours.
Do I need a permit?
In most municipalities in Quebec, no permit is required to install a wall-mounted heat pump. However, check with your municipality for local regulations regarding the location of the outdoor unit.
Can I install the system myself or do I need help?
The installation can be done alone, but having a second person makes things much easier, especially to hold the indoor unit during assembly and to pass the lines through the wall.
What if I make a mistake?
DIY systems are designed to be forgiving. If you make a mistake before commissioning, you can usually correct it. Contact our technical support team—we've seen it all and can guide you.
Are DIY systems as effective as professional systems?
Absolutely. Kanartic DIY heat pumps use the same high-quality components as our professional models: inverter compressors, environmentally friendly R454B refrigerant, and efficiency up to 26 SEER. The only difference is the simplified connection system.
Can I get subsidies for a DIY installation?
The Rénoclimat program in Quebec offers subsidies for efficient heat pumps. Eligibility may vary depending on the program—check the current criteria, as some require installation by a certified contractor.
What is the lifespan of a heat pump?
With regular maintenance (filter cleaning, annual inspection), a Kanartic heat pump can last 15 to 20 years .
Final checklist before installation
Print this list and check off each item before you begin:
☐ I have read the complete installation manual
☐ I watched the Kanartic installation video
☐ I have all the necessary tools
☐ I have chosen the location of the indoor unit
☐ I have chosen the location of the outdoor unit
☐ I checked that there are no obstructions in the wall (wires, pipes)
☐ My electrical circuit is suitable (voltage, amperage)
☐ I have a stable base for the outdoor unit
☐ I have some caulk/foam to seal the hole
☐ I have a second person to help me (recommended)
Ready to get started?
Installing a heat pump yourself is within reach of any motivated DIYer. With the right tools, proper preparation, and this guide, you can save thousands of dollars while enjoying the comfort of a high-efficiency heat pump.
Next step: Use our BTU calculator to determine the ideal power for your space, then choose your Kanartic DIY heat pump.
See DIY heat pumps BTU calculator
Questions? Our team is here to help. Use the chat in the bottom right corner or consult our full FAQ .